Want to reach an audience beyond Google Ads? Bing Ads (now Microsoft Advertising) connects you to over 1 billion monthly visitors across Bing, MSN, and more, offering lower costs per click (30%–50% less than competitors) and a unique audience profile: older, affluent, and often decision-makers. Here’s how to set up your campaign:
- Create a Microsoft Advertising Account
- Register at ads.microsoft.com.
- Set your time zone and currency (cannot be changed later).
- Add payment methods (credit card, PayPal, or bank transfer).
- Define Campaign Goals
- Choose from Sales, Leads, Website Traffic, or Brand Awareness as part of your paid search services strategy.
- Match goals with conversion tracking for better performance.
- Conduct Keyword Research
- Use Microsoft’s Keyword Planner to find relevant terms.
- Select match types (Broad, Phrase, Exact) and add negative keywords to avoid irrelevant clicks.
- Set Budget and Bidding Strategy
- Start with Manual CPC or Enhanced CPC.
- Gradually scale to automated strategies like Target CPA after collecting enough data.
- Create Ads and Extensions
- Write clear, concise ad copy.
- Add extensions like sitelinks, callouts, and promotions to increase visibility.
- Install Tracking and Launch
- Use the Universal Event Tracking (UET) tag to track conversions.
- Verify settings and start with a soft launch to monitor performance.
- Monitor and Optimize
- Track metrics like CTR, CPA, and ROAS.
- Refine keywords, bids, and ad creatives through A/B testing.
Key Stats: Bing Ads has a 1.25% average CTR and a 2.94% conversion rate, with CPCs ranging from $1.50 to $2.80 – making it a cost-efficient option for targeting high-value audiences.
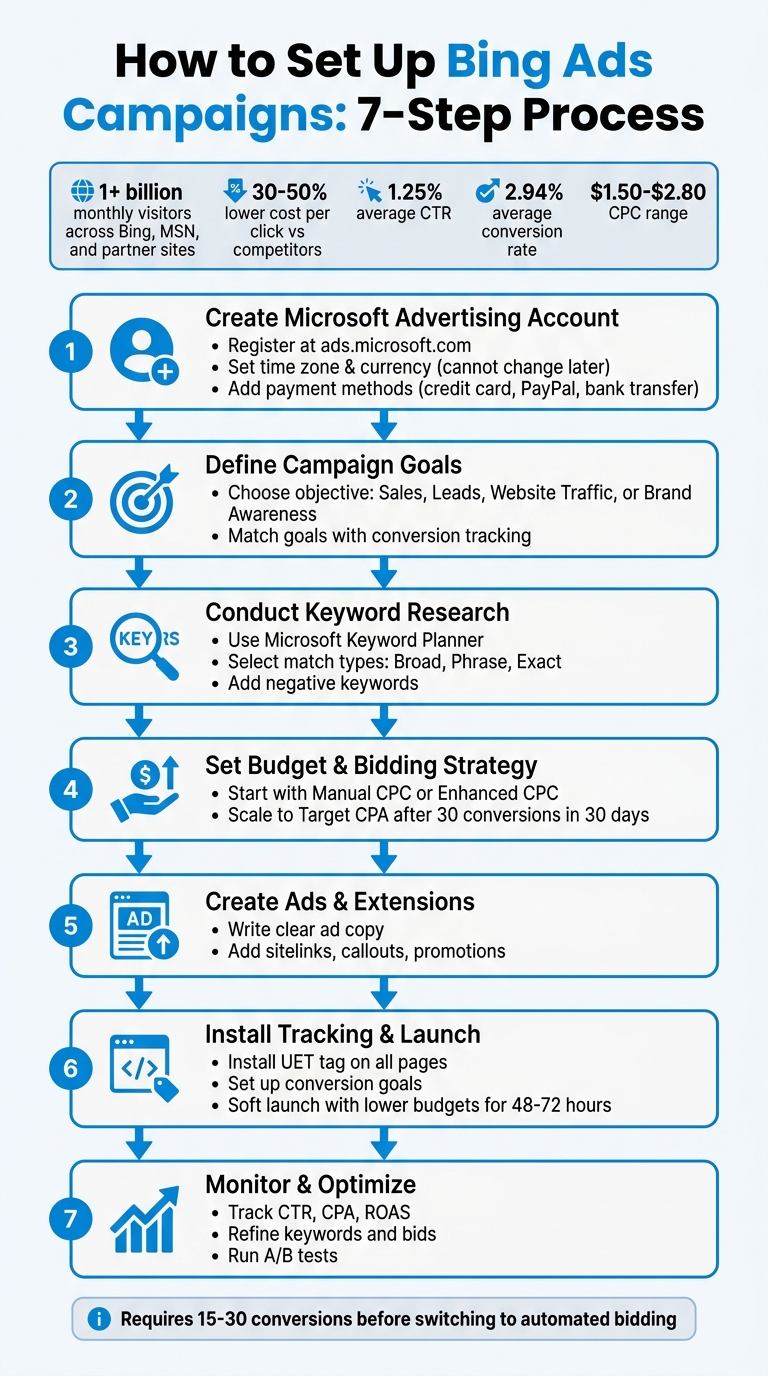
7-Step Bing Ads Campaign Setup Process
Step 1: Create Your Microsoft Advertising Account
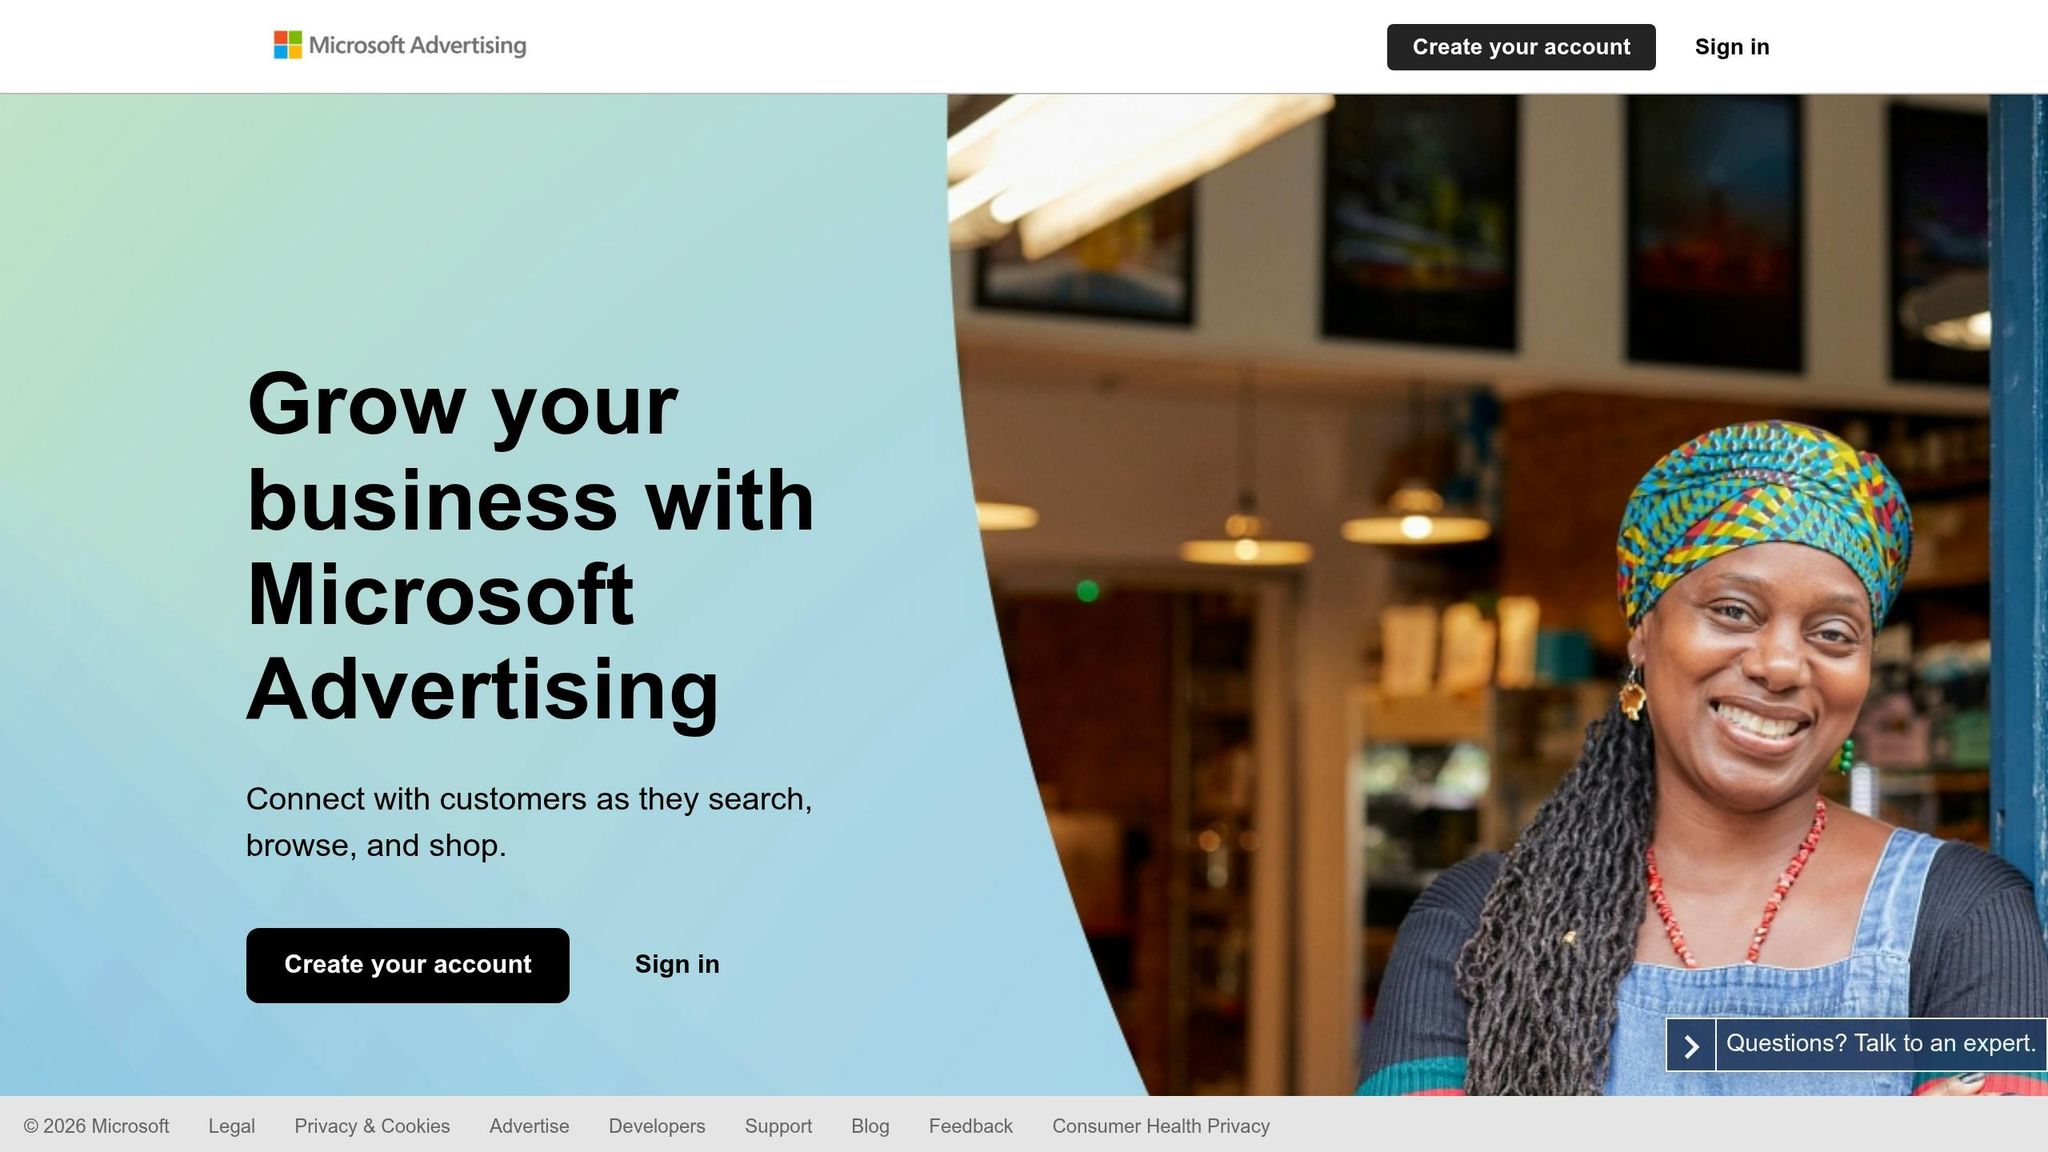
Register for a Microsoft Advertising Account
Head over to ads.microsoft.com to start the registration process – it’s free. You can sign in with an existing Microsoft account (like Outlook, Hotmail, Skype, or Xbox), or you can create a new one. Google and Facebook credentials are also accepted, except in China and India.
During the sign-up, you’ll need to provide your business website URL, country, and preferred advertising language. Microsoft will also ask for your legal business name, business email, and phone number. Be sure to specify your "Primary use", whether it’s for promoting your own business or managing accounts for clients. After providing these details, you’ll verify your email through a code sent by Microsoft, and you may also need to complete a CAPTCHA.
Choose your time zone and currency carefully. These settings are locked once your account is created. According to Microsoft Advertising Help:
"Each account can only have one currency, and you can’t change the currency after you set up the account".
If you accidentally select the wrong currency, you’ll have to create a new account and manually transfer all your data.
Set Up Payment Methods and Billing Preferences
Go to the "Billing" section in the left-hand menu and click on "Payment methods" to set up how you’ll pay. For US-based accounts using USD, you can link credit or debit cards, PayPal, or bank accounts for transfers. Microsoft offers three billing options:
- Postpay threshold: You’re charged monthly or when you hit a spending limit.
- Prepay: Add funds in advance to your account.
- Monthly invoice: Requires a credit check and certain spending criteria.
If you’re using postpay, it’s a good idea to set up a backup payment method to avoid campaign disruptions. For prepay accounts, you can enable auto-recharge, which automatically adds funds when your balance falls to 20% of the recharge amount. Credit and debit card payments are processed instantly, but bank transfers can take up to five business days to reflect.
Once your payment and billing preferences are sorted, you’re ready to finalize your account setup by confirming your time zone and currency settings.
Adjust Time Zone and Currency Settings
Double-check that USD is selected for your currency. You can verify your settings by navigating to "Tools" > "Billing & payments" for currency and "Settings" > "Account settings" for time zone. The time zone you choose will apply to all your campaigns and determine how performance data is reported.
While it’s technically possible to change the time zone later, doing so can create reporting issues, like "ghost" hours with no data or duplicate spend reports for a day or two. To avoid these complications, consider using the "Ad viewer’s time zone" option when scheduling ads. This ensures your ads run at the same local time (e.g., 9 AM to 5 PM) across different US time zones, such as Eastern and Pacific.
sbb-itb-7a4ada9
Step 2: Define Campaign Goals and Settings
Choose Campaign Goals
After setting up your account, the next step is to clearly define what you want your campaign to achieve. Microsoft Advertising offers four main objectives: Sales, Leads, Website Traffic, and Brand Awareness. Your choice here will shape the bidding strategies, audience targeting options, and creative formats available to you.
Here’s a quick breakdown of these objectives:
- Sales: Ideal for driving online purchases.
- Leads: Focused on generating sign-ups or inquiries.
- Website Traffic: Geared toward increasing the number of visitors to your site.
- Brand Awareness: Designed to reach a broader audience.
Make sure your objective matches your conversion tracking setup. For instance, if you’ve only set up "Page View" tracking, avoid selecting "Sales" as your goal.
| Business Objective | Recommended Campaign Type | Primary Conversion Metric |
|---|---|---|
| Drive Online Sales | Shopping, Performance Max | Purchase / Transaction |
| Generate New Leads | Search, Display & Native | Lead Form Submission / Phone Call |
| Increase Site Visits | Search, Responsive Search Ads | Click-through Rate (CTR) |
| Build Awareness | Video & Connected TV (CTV) | Impressions / Video Views |
Set Daily Budget and Bidding Strategy
Once your goals are in place, it’s time to set your daily budget and bidding approach. Your monthly budget is calculated by multiplying your daily budget by the number of days in the month. Be aware that daily spending may occasionally exceed your set limit by up to 100% to adjust for traffic fluctuations, though the total monthly budget will generally stay within the specified amount.
For new campaigns, starting with Manual CPC or Enhanced CPC gives you more control. Automated strategies like Target CPA and Target ROAS require at least 30 conversions within 30 days to work effectively. If you opt for Maximize Clicks or Maximize Conversions, you can set a maximum CPC cap to avoid overpaying for individual clicks.
| Bid Strategy | Best For | Requirements |
|---|---|---|
| Manual CPC | Full control and initial testing | None |
| Enhanced CPC (eCPC) | Boosting conversions while managing CPC | None (UET tag recommended) |
| Maximize Conversions | Maximizing conversions within budget | UET tag and conversion goal |
| Target CPA | Achieving a specific cost per acquisition | 30 conversions in 30 days |
| Target ROAS | Optimizing revenue for a return target | 30 conversions + non-zero revenue |
Set a daily budget in USD that allows for enough clicks to gather meaningful data. Once your campaign shows steady performance, you can gradually raise the budget by 10–25% over several days to scale results.
Configure Location, Device, and Scheduling Options
Fine-tune your campaign by selecting location, device, and scheduling preferences. For targeting US audiences, you can narrow your focus by state, city, zip code, county, or metro areas (referred to as "Microsoft Market Areas"). Radius targeting is another option, allowing you to show ads within a specific distance (measured in miles) around a zip code, landmark, or set of coordinates.
Pay close attention to Location Intent Options. By default, Microsoft targets "People in, searching for, or viewing pages about your targeted location". If your business operates strictly locally – like a physical store – adjust this to "People in your targeted location" to avoid wasting budget on irrelevant users.
Device targeting is divided into three categories: Computers, Smartphones, and Tablets. You can adjust bids to prioritize devices that perform best for your audience. For ad scheduling, remember that Microsoft Advertising uses the searcher’s local time zone.
"When targeting by time, you are targeting the searcher’s local time zone".
Align your ad schedule with key times when your US-based team is available to handle leads or when your audience is most active. Additionally, Microsoft’s integration with LinkedIn allows you to target professionals by company, industry, or job function. This capability can boost results, as Microsoft Advertising reports that "Using any type of audience targeting results in a 50% higher conversion rate on average".
Step 3: Conduct Keyword Research and Structure Ad Groups
Use Microsoft Keyword Planner for Research
Think like your potential customer. For example, someone searching for "buy running shoes" is likely ready to make a purchase, while someone searching for "best running shoes" might still be exploring options. These subtle differences reflect where they are in the buyer’s journey. Start by brainstorming keywords from this perspective, then head over to Microsoft Advertising and use the Keyword Planner under Tools.
The planner allows you to input specific keywords or even paste a website URL to extract relevant terms from your landing page. You can refine your results by filtering based on historical data, including or excluding phrases, or removing keywords you’ve already targeted. The tool provides valuable insights like search volume, trends, performance predictions, and cost-per-click (CPC) estimates.
When conducting your research, decide whether to focus solely on Bing or include data from Microsoft partner sites like Yahoo! and DuckDuckGo. You can also scroll to the bottom of Bing search result pages to find "related searches" and add those phrases to your keyword list. Don’t overlook low-volume keywords if they’re highly relevant to your niche – they often face less competition and can still yield strong results. This data will guide your choice of keyword match types.
Choose Keyword Match Types and Add Negatives
Once you’ve gathered your keywords, Microsoft Advertising offers three match types to refine how your ads are triggered: Broad Match, Phrase Match, and Exact Match. Here’s how they work:
- Broad Match (keyword): Shows ads for related searches, including synonyms or searches with similar intent, even if the keyword itself isn’t in the query.
- Phrase Match ("keyword"): Displays ads when the search query contains the meaning of your keyword or a more specific version of it.
- Exact Match ([keyword]): Offers the most precision, triggering ads only when the search query matches your keyword exactly.
If you’re launching a new campaign or working with a limited budget, start with Exact Match to ensure your ads are highly relevant. Once you’ve collected enough data, you can expand to Phrase Match for broader reach. Be sure to regularly check your search term reports to spot irrelevant queries. Add these as negative keywords – either as Negative Exact ([keyword]) or Negative Phrase ("keyword") – to avoid wasting ad spend on unwanted searches.
| Match Type | Syntax | Best For |
|---|---|---|
| Broad Match | keyword | Discovering new trends and building awareness |
| Phrase Match | "keyword" | Balancing reach and relevance |
| Exact Match | [keyword] | Targeting high-intent users and maximizing ROI |
Organize Ad Groups by Themes
To keep your campaigns focused and effective, organize your ad groups around specific themes. These themes could be based on product categories, audience segments, or even messaging strategies. Aim for 10–20 closely related keywords per ad group, with ad copy and landing pages that align with those keywords. This tight alignment can improve your Quality Score, leading to better ad placements and lower CPCs.
Each ad group should include up to three responsive search ads and one dedicated landing page. For example, if you’re selling athletic shoes, create separate ad groups for "running shoes", "basketball shoes", and "cross-training shoes" instead of grouping them all together. This way, your ad copy can speak directly to what the searcher is looking for, boosting engagement and performance.
Microsoft (Bing) Ads Tutorial | Everything You Need to Know (Complete 2025 Guide for Beginners)
Step 4: Create Ads and Extensions
Once your keyword strategy is ready, the next step is crafting ads that grab attention and using extensions to enhance your campaign’s visibility and effectiveness.
Write Effective Ad Copy
Your ad copy needs to be clear, accurate, and in line with Microsoft Advertising’s guidelines. For English-speaking audiences, follow these formatting rules: use title case (capitalize the first letter of major words) for ad titles and sentence case (capitalize only the first word and proper nouns) for descriptions. Always stick to proper grammar and spelling, and limit punctuation like exclamation points or question marks to one per sentence. Avoid creating false urgency with phrases like "Act now!" or "Hurry – supplies are limited."
Since ads have character limits, make the most of your space. Use approved abbreviations and symbols like &, #, and % when appropriate. If you’re incorporating dynamic text insertion (e.g., {keyword}), double-check that it fits grammatically into your ad. Ensure your display URL aligns with the top-level domain of your landing page. You can add subfolders (e.g., website.com/Running-Shoes) to help users understand where they’ll land. Stay away from gimmicks like excessive capitalization, strange symbols, or clickbait language that could lead to ad rejection.
Once your ad copy is solid, you can boost its impact by adding ad extensions.
Add Ad Extensions for Better Engagement
Ad extensions give your ads more space on the search results page, which can lead to higher click-through rates. Microsoft Advertising offers several types of extensions to suit different campaign goals.
- Sitelink extensions: These allow you to include up to 10 additional links to specific landing pages.
- Callout extensions: These are non-clickable snippets that highlight key features or benefits. For best results, associate at least two callout extensions (you can add between 2 and 20 per campaign).
- Price and promotion extensions: These are great for e-commerce campaigns, as they showcase product prices or special offers directly in your ad. Keep in mind that promotion extensions are only available in certain markets, such as the U.S., U.K., Canada, Germany, France, and Australia.
Microsoft Advertising reviews all ad extensions to ensure they meet policy standards. To get the most out of them, avoid repeating information. For example, structured snippet extensions should provide new details, not duplicate what’s already in your ad copy. When used effectively, ad extensions not only make your ad stand out but also attract more qualified clicks to your site.
Step 5: Configure Tracking and Launch the Campaign
Before you set your campaign live, it’s crucial to have tracking tools in place. These will help you understand what happens after someone clicks on your ad. Without tracking, you won’t know which keywords or ads are delivering results.
Install Universal Event Tracking (UET) Tag
The Universal Event Tracking (UET) tag is the backbone of Microsoft Advertising’s data system. It’s essential for tracking conversions, building remarketing audiences, and enabling automated bidding strategies. To create your UET tag, navigate to Tools > Conversion tracking > UET tags and click Create.
Once created, the tag must be installed across your entire website – on every page. You can either paste the script directly before the </head> tag on each page or use Google Tag Manager (GTM). GTM is often the better choice since it centralizes the management of all your tracking codes. Use a Custom HTML tag in GTM and set it to trigger on "All Pages."
After installation, confirm the tag is working. You can do this by checking the "Tracking Status" in your Microsoft Advertising account or using a browser tag assistant to verify the bat.bing.com signal is firing. Keep in mind, it may take up to 24 hours for activity to show up in your account.
Set Up Conversion Tracking
With your UET tag active, the next step is defining what counts as a conversion. Conversions could include actions like landing on a "Thank You" page after a purchase or completing a specific event, such as clicking a button or submitting a form.
Structure your goals wisely:
- Primary goals: These should represent high-value actions, like purchases or qualified leads, and are used to train bidding algorithms.
- Secondary goals: These are for observation or audience-building purposes, like newsletter signups, but aren’t used for bidding.
For lead generation campaigns, set counting to "One" conversion per click to avoid duplicates. For e-commerce, choose "Every" to track all purchases. If you’re planning to use automated bidding strategies like Target CPA or Target ROAS, ensure you have at least 15–30 conversions recorded in the past 30 days. This data is critical for the algorithm to function effectively.
Before scaling, manually trigger each conversion goal and verify its appearance under Conversions > Diagnostics. This step helps you catch and resolve any tracking issues early, ensuring everything is ready for launch.
Review Settings and Launch
Before launching your campaign, take the time to double-check all settings and tracking configurations. A final review can save you from costly errors. Here’s what to focus on:
| Review Category | What to Check | Why It Matters |
|---|---|---|
| Tracking | UET tag "Recent Activity" status | Confirms that data is being sent to Microsoft Advertising. |
| Tracking | Primary vs. Secondary goals set correctly | Ensures that bidding focuses on ROI-driving actions. |
| Settings | Timezone and currency | Avoids irreversible reporting and billing errors. |
| Budget | Daily budget caps in place | Helps control spending during the learning phase. |
| Keywords | Negative keyword lists applied | Reduces wasted spend on irrelevant searches. |
| Ads | Final URL matches display domain | Prevents ad disapprovals due to policy violations. |
Start with a soft launch by using lower budgets and Manual or Enhanced CPC bidding for the first 48–72 hours. During this period, review your Search Terms report daily. This will help you identify irrelevant queries and add them as negative keywords, which prevents unnecessary budget waste.
Step 6: Monitor and Optimize Campaign Performance
Once your campaign is live, the real work begins. Regular monitoring and fine-tuning are what separate successful campaigns from those that fall flat. The key is to analyze performance data, identify what’s effective, and make adjustments to improve results over time.
Track Key Performance Metrics
Pay attention to the metrics that directly impact your goals. For example, Bing Ads have an average Click-Through Rate (CTR) of 2.83% across industries. If you notice keywords or ad copies with a CTR below 0.5%, it’s time to revisit your ad messaging or keyword targeting.
Metrics like Conversion Rate (CVR), Cost Per Conversion (CPA), and Return on Ad Spend (ROAS) are critical for evaluating success. Bing’s average conversion rate is 2.94%, with an average CPA of $41.44, which is about 30% lower than Google Ads. If your numbers are off track, check your Quality Score (rated from 1 to 10). This score is influenced by factors like expected CTR, ad relevance, and landing page experience. A higher Quality Score can help reduce your Cost Per Click (CPC).
Also, keep an eye on metrics like Impression Share and Top Impression Rate to understand how often your ads appear compared to competitors. If budget limitations are reducing your impression share, consider shifting funds away from underperforming campaigns. These metrics provide valuable insights for refining your bidding and keyword strategies.
Refine Keywords and Adjust Bids
Start by reviewing the Search Terms Report daily at first, then scale back to weekly reviews. This report shows the actual search queries triggering your ads, helping you identify and exclude irrelevant traffic. Adding negative keywords like "free", "cheap", "jobs", or "DIY" can help focus your ads and improve CTR.
If keywords are underperforming – such as those with a CTR below 0.5% or those consuming more than 20% of your keyword budget without conversions – pause them. For broad match keywords that lead to wasted spend, switch to Phrase or Exact match. Use Negative Phrase match to block entire themes (e.g., "free trial") and Negative Exact match to exclude specific irrelevant queries while keeping valuable long-tail traffic.
Once you’ve gathered 15–30 conversions over a 30-day period, you can consider shifting from Manual CPC or Enhanced CPC to automated bidding strategies like Target CPA or Target ROAS. Clean keyword data will help Bing’s AI optimize more effectively. If performance improves, gradually scale up your budget.
Use A/B Testing to Improve Ads
After refining your keywords and bids, focus on improving your ad creative with A/B testing. Microsoft Advertising’s Drafts & Experiments feature allows you to test variables like ad copy, bidding strategies, and targeting. Make sure to test just one variable at a time – whether it’s a new headline, a revised call-to-action, or an updated ad extension – to measure its impact accurately.
You can choose between traffic-based experiments (where users see different versions randomly) or cookie-based experiments (where users consistently see the same version). While cookie-based tests may provide more precise data, they often take longer to reach statistical significance. Up to 10 nonconcurrent experiments can run per base campaign, with traffic splits ranging from 1% to 99%.
Set a clear timeline for your experiments. Once you have enough data, either "Promote" successful changes to your base campaign or "Graduate" them into a new stand-alone campaign. This approach ensures you’re constantly improving your campaign’s performance without wasting resources.
Conclusion
Creating a successful Bing Ads campaign isn’t something you set and forget – it’s a process that requires consistent effort and fine-tuning. From setting up your account to installing the UET tag, every step lays the groundwork for achieving measurable results.
Microsoft Advertising offers some clear advantages. It connects you to nearly 14 billion monthly searches across Bing, Yahoo, and AOL, with an average click-through rate (CTR) of 1.25%, outperforming Google Ads’ 0.86%. Real-world examples highlight its potential: GLAMI achieved a 130% year-over-year increase in sessions by using Microsoft Shopping, and InnoGames lowered their cost per conversion by adopting target CPA bidding. As Arkadiusz Mokrzycki, Performance Marketing Lead at GLAMI, explained:
"In just one year of leveraging Microsoft Shopping, we saw an increase of 130% of sessions year-over-year (YoY). Additionally, Microsoft Shopping generated 76% more orders for our partners YoY".
These results emphasize how critical it is to start with a strong setup and make strategic tweaks as your campaign evolves. Once you’ve gathered 15–30 conversions within a 30-day period, you can transition to automated bidding strategies like Target CPA or Target ROAS. Begin with modest budgets and regularly analyze search terms to fine-tune your targeting and control costs. The data collected during the learning phase is invaluable for shaping your optimization efforts.
The key to long-term success lies in continuous improvement. Monitoring Quality Score, refining keywords, experimenting with ad variations, and adjusting bids are all essential practices. With Microsoft Advertising’s pay-per-click model and no minimum spend requirement, you maintain full control over your budget while accessing an audience that tends to be older, more affluent, and more mature than those on other platforms.
FAQs
How much should I budget to start on Microsoft Advertising?
There’s no set starting budget for Microsoft Advertising – it all depends on your goals and flexibility. You can choose between daily budgets or total campaign budgets. Many advertisers kick things off with a daily spend of $20–$50 to test the waters and fine-tune their campaigns. Starting small allows you to track performance closely and tweak your strategy to match your goals and maximize ROI. This way, your budget stays aligned with both your audience and advertising objectives.
When should I switch from Manual CPC to Target CPA or Target ROAS?
When your campaign has gathered enough historical conversion data and aligns with automated bidding objectives, consider switching to Target CPA (Cost-Per-Acquisition) or Target ROAS (Return-On-Ad-Spend) strategies. Starting August 4, 2025, Bing Ads will allow these strategies to be used alongside Maximize Conversions. Automated bidding performs best when your goals are centered on specific CPA or ROAS targets, as the algorithms rely on sufficient data to optimize efficiently.
How do I know my UET tag and conversions are tracking correctly?
To make sure your UET tag and conversions are working correctly, start by checking that the tag is installed on your website and firing as it should. Double-check that the conversion goals set up in your Microsoft Advertising account match the important actions you want to track, like purchases or form submissions. Test these actions directly on your site to confirm they’re being tracked accurately. You can use Microsoft Advertising tools or your tag manager to troubleshoot any issues and keep an eye on data consistency.